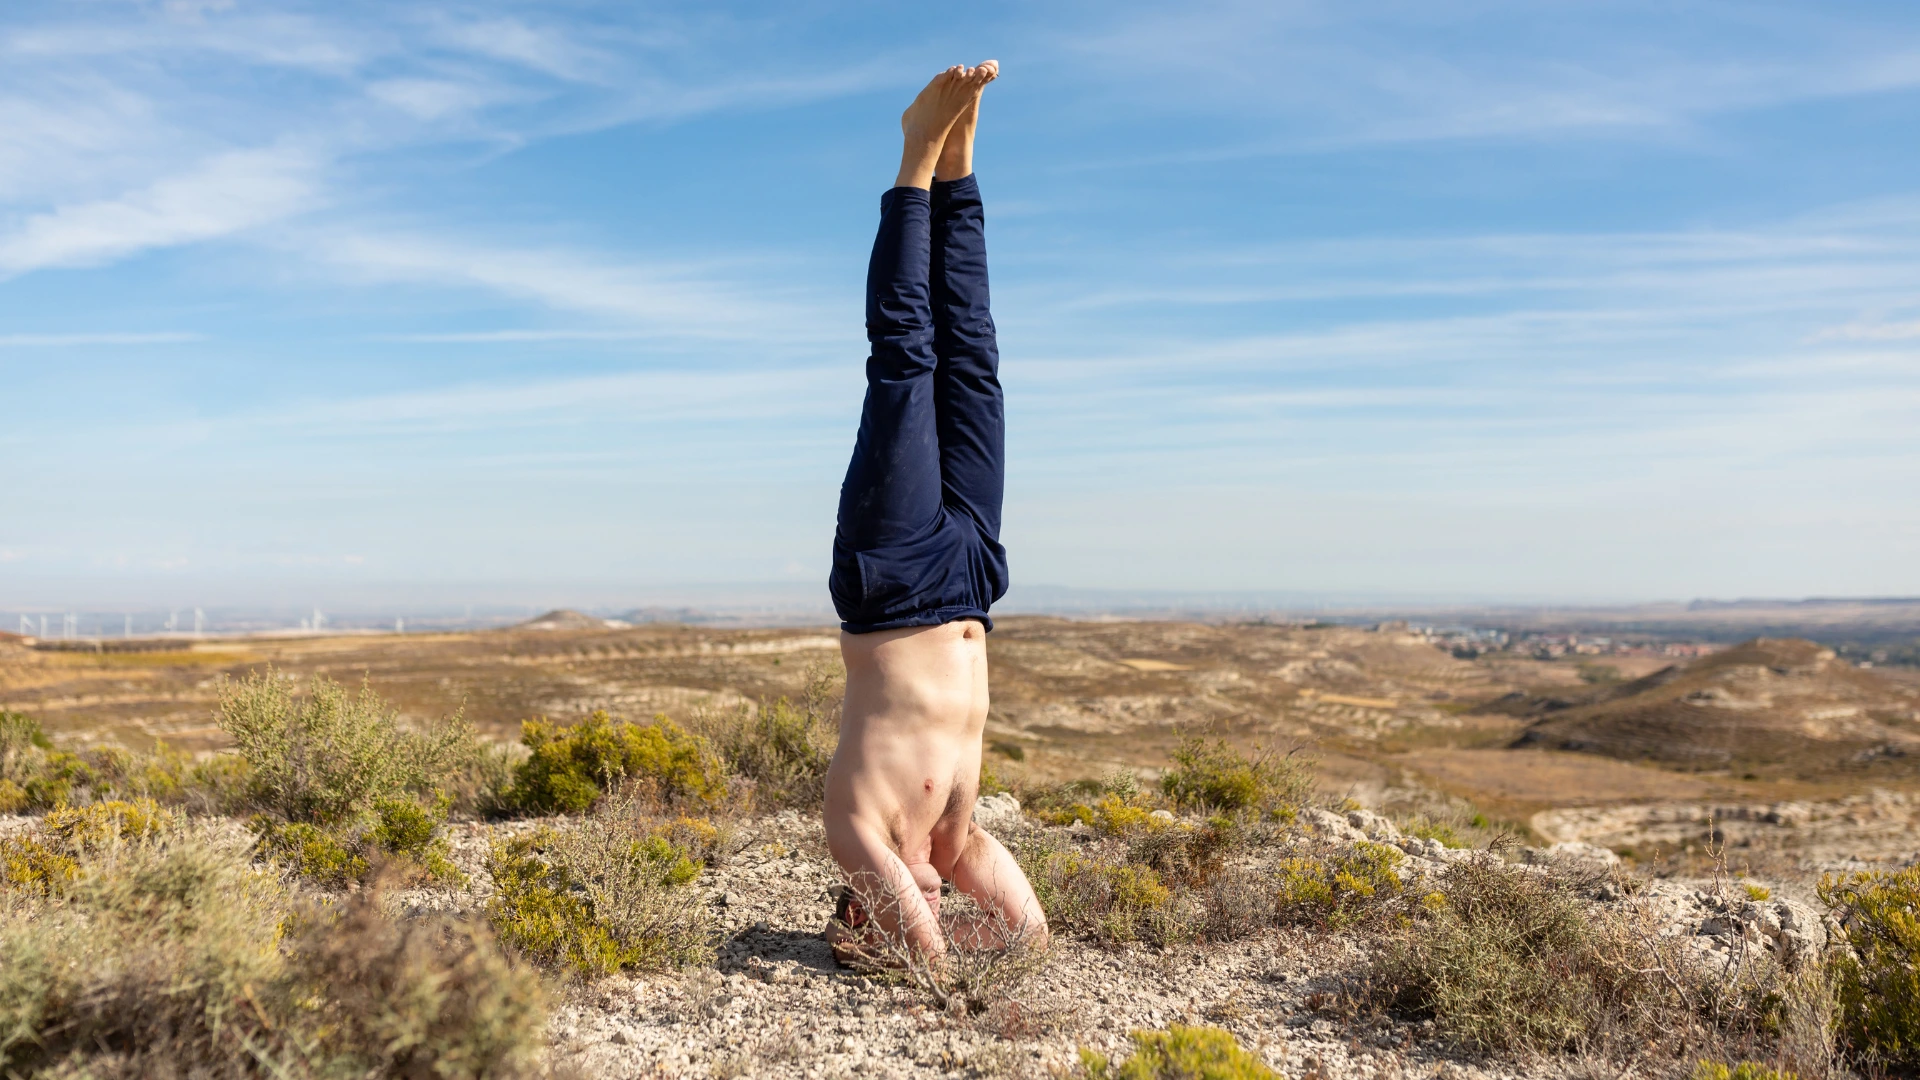
Sirsasana – Headstand Pose | Steps, Benefits, and Cautions
Let’s jump into the magic of Sirsasana, also known as the Headstand Pose! This isn’t just any ordinary move – it’s known as the king of all yoga poses. Why, you ask? Because going upside down can seriously boost both your body and mind. But no worries, I’m not just going to toss you into a headstand – I’ve got some solid steps and tips to guide you safely through it!
What is Sirsasana?
Sirsasana, also called the Headstand Pose, is one of the most revered asanas in yoga. It’s known for its numerous physical and mental benefits, but it’s also one of those poses that can seem a little intimidating if you’re new to yoga. Imagine balancing all your weight on your head and arms! But don’t sweat it – with practice, patience, and a little guidance, you’ll be on your head in no time. Online yoga classes can help you master Sirsasana, or Headstand Pose, with ease!
Ready to dive into this upside-down adventure? Let’s start with the steps.
How to Do Sirsasana (Headstand Pose)
Step 1: Start with a Foundation
Begin by sitting on your knees in a kneeling position, also known as Vajrasana. This helps ground your body and get your mind in the right space.
Step 2: Set Up Your Arms
Bring your forearms to the floor and interlock your fingers. This forms a stable base for your head. Your arms should form a triangle, which is crucial because you don’t want to be balancing on your head alone – your forearms will take a lot of the load.
Step 3: Place Your Head
Gently place the crown of your head between your interlocked fingers. Make sure the back of your head is snug against your hands, and you’re not pressing down too hard. Balance is key here, not brute force.
Step 4: Lift Your Knees
Now comes the fun part. Tuck your toes and gently lift your knees off the floor, coming into a dolphin-like position with your hips raised. Walk your feet closer to your head. This will help align your body for the next step.
Step 5: Tuck and Lift One Leg
Engage your core (that’s your powerhouse!), and slowly tuck one knee toward your chest, balancing with the help of your forearms. Take your time here – no rush! Once you’re steady, gently lift the other leg to join.
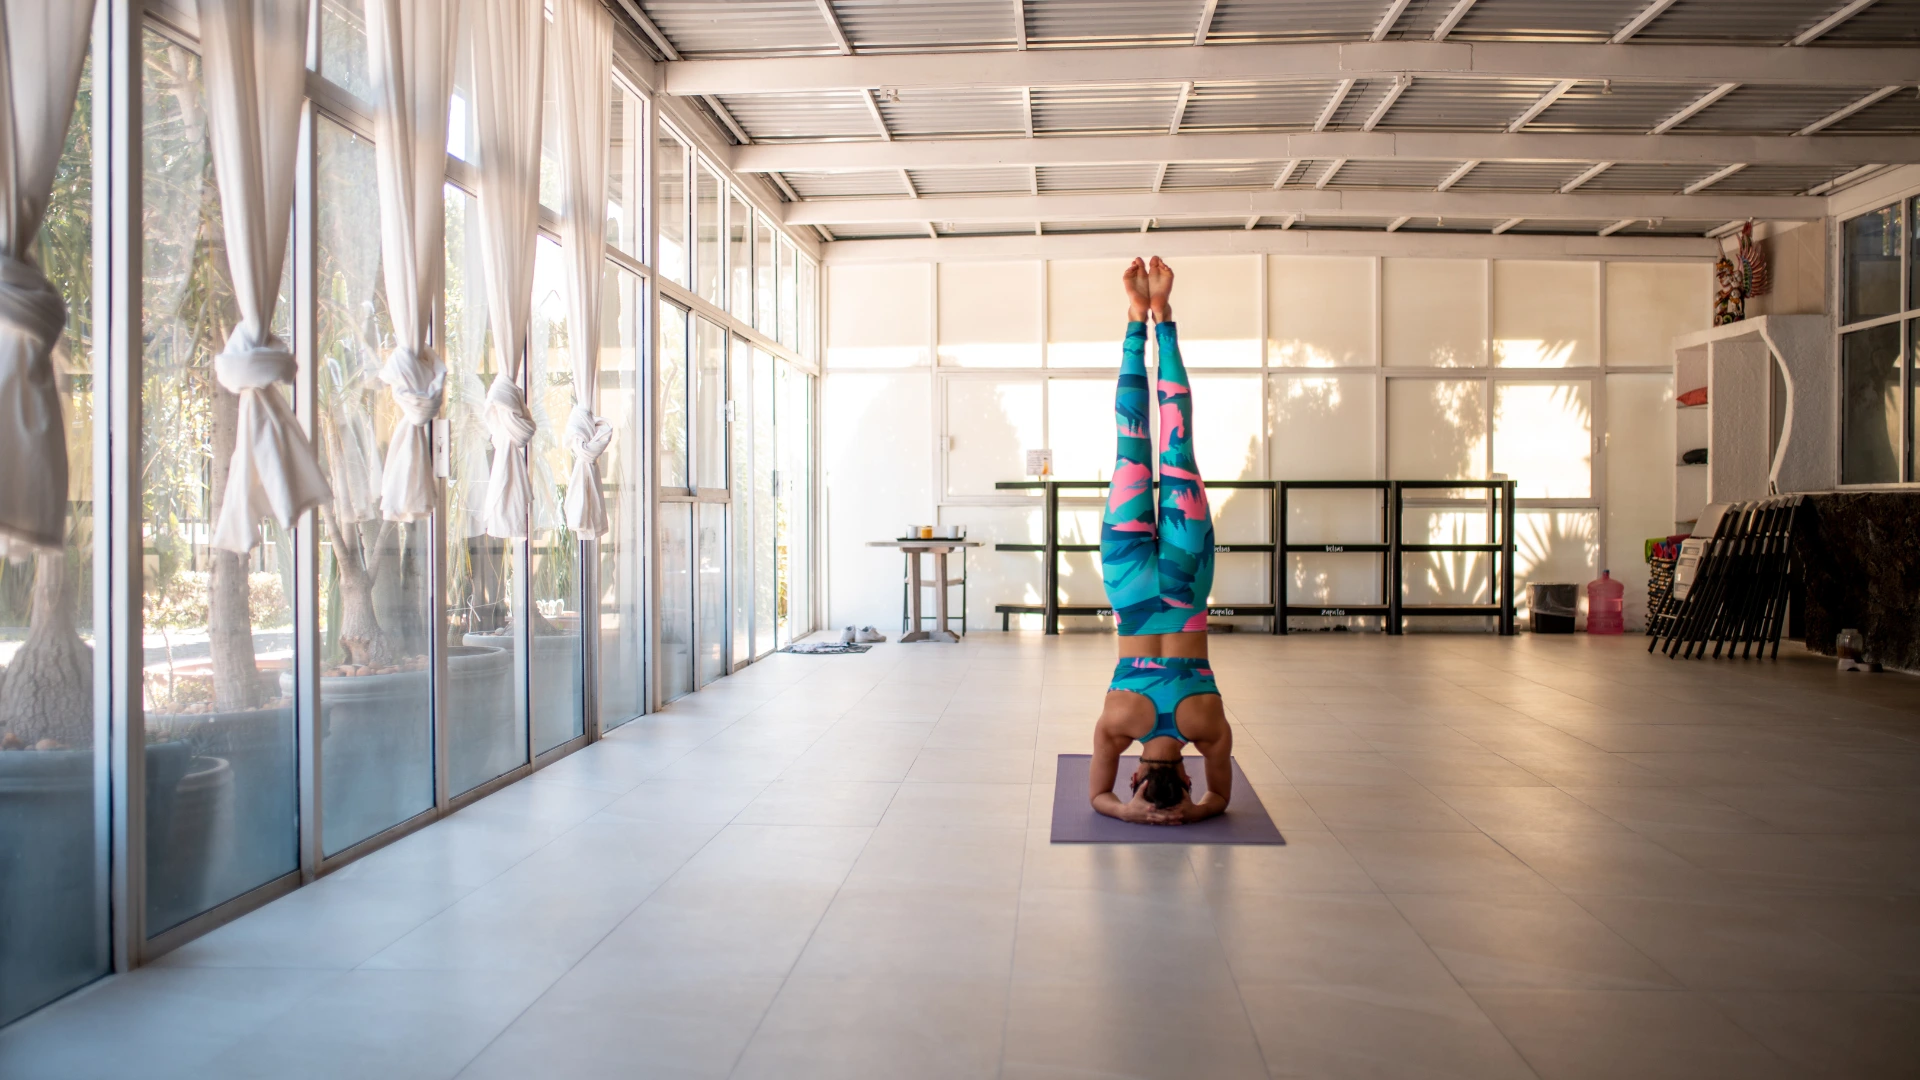
Step 6: Straighten Both Legs
Now that you’re floating with your knees tucked, engage those abs again and slowly straighten your legs up toward the ceiling. Your body should form a straight line from head to toe.
Step 7: Breathe and Hold
Once you’re fully in the headstand, breathe deeply and hold the pose for a few seconds. As a beginner, you might only last a few moments, but over time, you can hold Sirsasana for up to 3 minutes.
Step 8: Safely Come Down
To come out of the pose, reverse the steps slowly. Bring your knees down to your chest, lower your feet to the floor, and relax back into Vajrasana. Take a few breaths to ground yourself – that was intense!
The longest duration to hold shirshasana pose is 1 hour, 49 minutes and 47 seconds
Benefits of Sirsasana – Why It’s Worth the Effort
Alright, so you know the steps, but why should you bother flipping upside down in the first place? Let’s get into the good stuff!
Boosts Blood Circulation
When you’re in a headstand, gravity helps the blood flow to your brain, giving your cells a fresh dose of oxygen. It’s like a power-wash for your brain, making you feel sharp, alert, and focused.
Strengthens Shoulders and Arms
Holding yourself up in Sirsasana requires serious upper body strength. It’s a great way to build those muscles without lifting weights, plus it improves balance and stability in your shoulders and arms.
Improves Core Strength
Your abs are working overtime to keep you upright in a headstand. This makes Sirsasana an amazing pose for building core strength and stability – think of it as the ultimate ab workout, but upside down.
Relieves Stress and Calms the Mind
Online yoga classes for stress can teach you how Sirsasana helps reset your nervous system. There’s something about being inverted that helps reset your nervous system. Sirsasana has a calming effect on the mind, helping to relieve stress, anxiety, and mental fatigue. Perfect for those hectic days!
Improves Digestion
Flipping upside down can actually help with your digestion. It stimulates your digestive organs and helps detoxify the body. If you’ve got a sluggish system, this pose might just be the boost you need.
Enhances Focus and Concentration
Balancing on your head takes a lot of mental focus. Regular practice can help sharpen your concentration, improve mental clarity, and even boost memory. Talk about a mind-body connection!
Promotes Healthy Skin
Who knew that a headstand could give you glowing skin? That increased blood flow to your face delivers nutrients and oxygen, which can help keep your skin clear and vibrant.
Cautions – Play it Safe, Yogi!
While Sirsasana is full of benefits, it’s not a pose you should jump into without the right precautions. Let’s talk safety.
Avoid If You Have Neck or Back Issues
The head and neck are major pressure points in this pose. If you’ve had any neck or back injuries, Sirsasana could aggravate them. It’s better to skip this pose or work with a certified yoga instructor for modifications.
Don’t Practice During Pregnancy
If you’re pregnant, it’s best to avoid headstands, especially in the later stages. There’s enough going on with your body – you don’t need the extra strain of an inversion.
High Blood Pressure and Heart Conditions
Inversions can put pressure on the heart and increase blood flow to the brain, which might not be ideal if you have high blood pressure or heart conditions. Always consult your doctor before diving into Sirsasana.
Build Strength Gradually
If you’re new to yoga, start with simpler inversions like Dolphin Pose to build strength in your arms and shoulders before attempting a full headstand. Sirsasana is not a beginner-level pose, and rushing into it can lead to injury.
Use a Wall for Support
When you’re learning, practicing against a wall is totally cool. It gives you that extra bit of security and prevents falls. As you get more comfortable, you can start weaning off the wall and working on your freestanding balance.
Be Patient
Like any challenging pose, Sirsasana takes time to master. Don’t get discouraged if you don’t nail it right away. Progress might be slow, but consistency is key. Celebrate every little victory along the way!
Avoid Overdoing It
Even when you’re feeling strong, holding Sirsasana for too long can strain your neck. Start small and work your way up in terms of duration. Your body will thank you for it!
Pro Tips for a Better Headstand

- Engage Your Core: Your abs are your best friends here. A strong core will keep you steady and balanced, making the whole experience much smoother.
- Relax Your Neck: Remember, your neck isn’t doing all the work! Your forearms should be taking most of the weight. Keep your neck relaxed to avoid strain.
- Breathe Deeply: It’s easy to forget to breathe when you’re upside down, but keeping a steady breath helps you maintain focus and balance.
- Take It Slow: Rushing into Sirsasana is a recipe for disaster. Build up strength and confidence over time.
Similarly, you can also read on “Pada Hastasana – Forward Fold Pose | Steps, Benefits, Cautions” to know about Pada Hastasana.
Conclusion
Sirsasana is more than just a cool party trick (though it is pretty impressive!). It’s a transformative pose that offers both physical and mental rewards. As with any advanced yoga pose, the key is patience and practice. Start small, listen to your body, and over time, you’ll find yourself mastering the king of asanas with confidence.
So, ready to flip your world upside down? Take it one step at a time, stay safe, and enjoy the journey!