5 Steps to Safely Practice Wheel Pose for Beginners
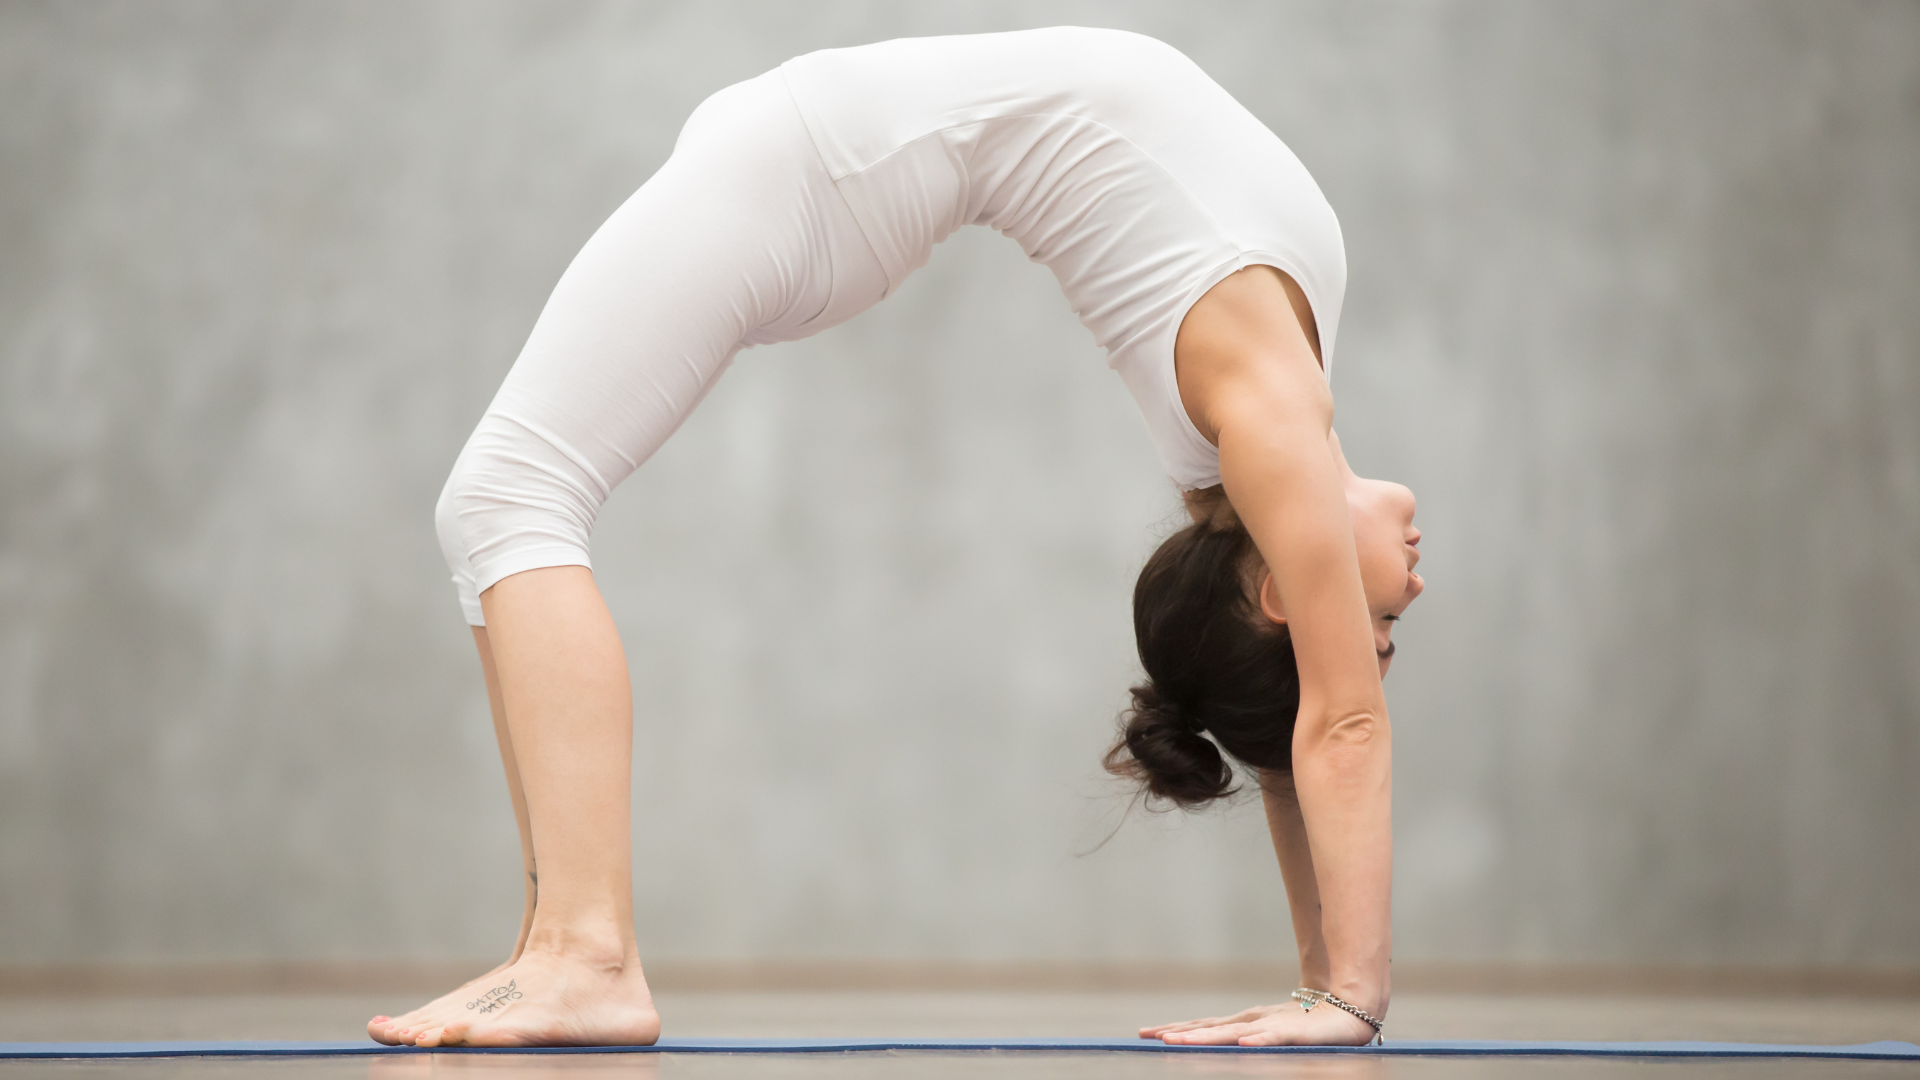
Wheel Pose (Urdhva Dhanurasana) is one of yoga’s most impressive and beneficial backbends. While the full expression might seem intimidating to newcomers, approaching this pose with proper preparation and technique along with guided online yoga for beginners can make it accessible and safe. This guide breaks down Wheel Pose into manageable steps that build strength, flexibility, and confidence for beginners.

Why Practice Wheel Pose?
Before diving into the how-to, let’s understand why Wheel Pose deserves a place in your practice:
Wheel Pose stretches the entire front body, opening the chest, shoulders, and hip flexors while strengthening the back, arms, legs, and core. This comprehensive engagement offers several benefits:
- Increased spinal flexibility – Counters the forward-bending posture many of us maintain throughout the day
- Improved shoulder mobility – Opens the chest and shoulders, areas often compressed from desk work and digital device use
- Enhanced energy levels – As a heart-opening pose, Wheel can combat fatigue and boost mood
- Strengthened posterior chain – Develops the often-neglected muscles along the back of the body
- Improved breathing capacity – Expands the chest, creating space for deeper breaths
With these benefits in mind, let’s explore how to safely work toward this posture.
Step 1: Assess Your Readiness
Before attempting Wheel Pose, it’s important to honestly evaluate your current physical condition. This self-assessment isn’t about judgment but about smart, safe practice.
Physical Prerequisites
To safely practice Wheel Pose, you should have:
- Wrist flexibility and strength – Your wrists need to comfortably bend to a 90-degree angle while bearing weight
- Shoulder mobility – You should be able to reach your arms overhead without arching your lower back
- Back flexibility – Basic backbends like Bridge Pose should feel comfortable
- Core stability – A strong core protects your lower back during deep backbends
Contraindications
Wheel Pose isn’t suitable for everyone. Avoid this pose if you have:
- Recent or chronic wrist, shoulder, or back injuries
- Uncontrolled high blood pressure
- Headaches or migraines
- Late-term pregnancy
- Certain heart conditions
When in doubt, consult with a healthcare provider before attempting deep backbends.
Step 2: Master the Preparatory Poses
Rather than jumping straight into Wheel Pose, spend time developing strength and flexibility through these foundational postures:
Bridge Pose (Setu Bandhasana)
Bridge Pose introduces the feeling of a backbend with less intensity:
- Lie on your back with knees bent, feet hip-width apart and close to your buttocks
- Place arms alongside your body with palms down
- Press through your feet and lift your hips toward the ceiling
- Keep your thighs parallel and engage your glutes
- Hold for 5-10 breaths, then slowly lower down
Practice tip: For added shoulder opening, interlace your fingers beneath your back while in Bridge Pose.
Supported Bridge
Use a yoga block to create a sustainable Bridge that develops back flexibility:
- From Bridge Pose, lift your hips and place a block under your sacrum (the flat area at the base of your spine)
- Rest your weight on the block and relax into the gentle backbend
- Stay for 1-2 minutes, focusing on deep breathing and relaxation
- Remove the block and slowly lower down
Cobra Pose (Bhujangasana)

Cobra strengthens the back muscles needed for Wheel:
- Lie face down with palms beside your chest and elbows tucked close to your body
- Press the tops of your feet, pubic bone, and thighs into the mat
- Inhale and lift your chest, keeping your lower ribs on the floor
- Roll your shoulders back and down, away from your ears
- Hold for 3-5 breaths before releasing down
Camel Pose (Ustrasana)
Camel develops upper back flexibility:
- Kneel with knees hip-width apart
- Place your hands on your lower back for support
- Lift your chest and gently arch backward
- For a deeper stretch, reach for your heels (or blocks placed outside your heels)
- Hold for 3-5 breaths before coming up slowly
Forearm Wheel
This variation uses forearms instead of hands, reducing wrist strain while developing back flexibility. Practicing with online personalized yoga classes. can help you refine your alignment and progress safely at your own pace.
- Begin in Bridge Pose
- Lower your upper back to the floor and place your forearms on the mat beside your head, palms flat
- Press through feet and forearms to lift your body into a backbend
- Hold for 3-5 breaths, then lower down with control
Spend at least 2-4 weeks consistently practicing these preparatory poses before attempting full Wheel.
Step 3: Strengthen Supporting Muscle Groups
Wheel Pose requires strength in several key areas. Incorporate these exercises into your regular routine:
For Wrists and Arms
Plank Pose Variations: Hold forearm plank and high plank for 30-60 seconds, focusing on proper alignment.
Dolphin Push-Ups: From Dolphin Pose (forearms on the floor in an inverted V-shape), lower your head toward the floor and push back up, repeating 5-10 times.
Wrist Stretches: Before practice, warm up your wrists with gentle circles and stretches, holding each position for 5-10 seconds:
- Fingers pointing toward knees
- Fingers pointing away from you
- Back of hands on the floor with fingers toward you
For Core Stability
Boat Pose (Navasana): Sit with knees bent, feet on the floor. Lean back slightly, lift feet off the floor, and extend legs if possible. Hold for 5-10 breaths.
Forearm Side Plank: From the forearm plank, rotate onto one forearm, stacking feet and lifting the opposite arm. Hold for 30 seconds per side.
Locust Pose (Salabhasana): Lie face down, extend arms alongside your body. Lift your chest, arms, and legs off the floor simultaneously. Hold for 3-5 breaths.

For Legs and Glutes
Chair Pose (Utkatasana): Stand with feet hip-width apart, bend knees, and sit back as if lowering into a chair. Hold for 5-10 breaths.
Warrior III (Virabhadrasana III): From standing, hinge forward, lifting one leg behind you while extending arms forward. Create one straight line from head to lifted heel. Hold for 5 breaths per side.
Incorporate these strengthening exercises into your practice 2-3 times per week.
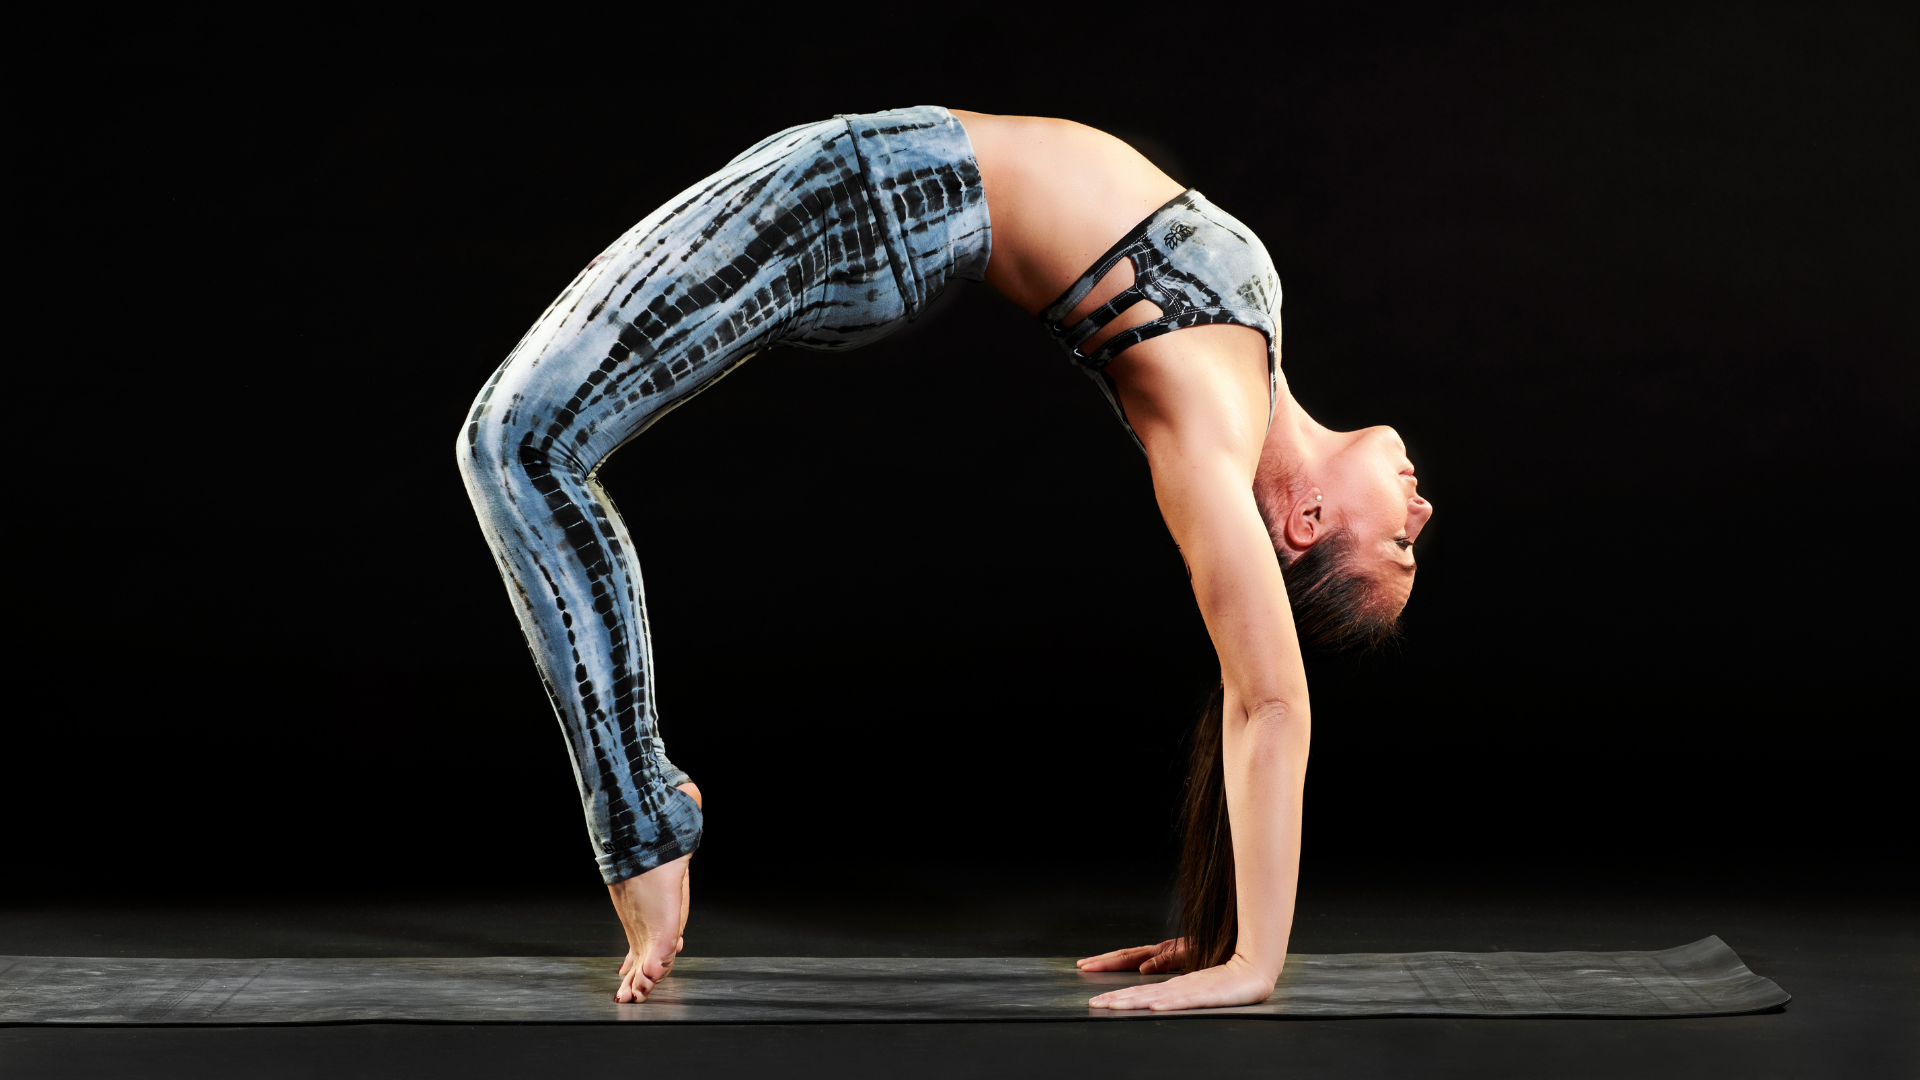
Step 4: Learn Proper Wheel Pose Technique
When you feel ready to attempt full Wheel Pose, follow these steps carefully:
Setting Up
- Lie on your back with knees bent, feet hip-width apart and placed close to your buttocks
- Place your palms on the floor beside your ears with fingers pointing toward your shoulders
- Ensure your elbows are shoulder-width apart and pointing toward the ceiling
- Press your feet firmly into the floor
Lifting Up
- Take a deep breath in
- As you exhale, press through your hands and feet to lift your hips and shoulders off the floor
- Straighten your arms as much as comfortable, but keep a slight bend in the elbows
- Allow your head to hang gently, keeping neck muscles relaxed
- Press your chest toward the wall behind you, creating more space in your upper back
Alignment Cues
Once in the pose, check these alignment points:
- Feet: Keep them parallel and hip-width apart
- Knees: Track directly over ankles, not splaying outward
- Thighs: Engage quadriceps and rotate thighs slightly inward
- Shoulders: Move shoulder blades toward spine to open chest
- Arms: Work toward straightening, but prioritize shoulder positioning over straight arms
- Neck: Keep it relaxed, not crunched
Coming Down
- Tuck your chin slightly toward your chest
- Bend your elbows and lower your head and shoulders to the floor with control
- Hug your knees to your chest and gently rock side to side to release your back
- Rest in a neutral position before attempting another repetition
For beginners, hold Wheel Pose for just 3-5 breaths and practice 1-3 repetitions.
Step 5: Progress Mindfully and Use Modifications
Even after mastering the basic form, continue to approach Wheel Pose with respect. Here are strategies for ongoing progress:
Smart Progression Plan
Week 1-2: Practice Bridge Pose and supported backbends Week 3-4: Introduce forearm wheel variations Week 5-6: Attempt full Wheel with short holds (1-3 breaths) Week 7-8: Increase hold time gradually (up to 5-8 breaths) Beyond: Explore variations once the basic pose feels stable
Helpful Modifications
Wall Practice: Place your hands against a wall while in Bridge Pose, walking hands down the wall to develop shoulder flexibility.
Strap Around Upper Arms: Loop a yoga strap around your upper arms just above the elbows to prevent them from splaying outward.
Block Between Thighs: Squeeze a block between your upper thighs to engage inner thighs and maintain proper leg alignment.
Partner Assistance: Have a knowledgeable yoga partner place their hands under your upper back for gentle support as you lift up.
Continued Refinement
As you become more comfortable in Wheel Pose, focus on these subtle actions:
- Lift your chest higher toward the ceiling
- Press your upper arms toward the wall behind you
- Extend through your legs, creating more length in your pose
- Distribute the backbend evenly throughout your spine
Common Mistakes to Avoid
Be mindful of these frequent errors that can lead to discomfort or injury. According to a research review, improper alignment, lack of warm-up, and pushing too hard without building foundational strength are common mistakes that can hinder progress and increase the risk of strain.
Placing feet too far from buttocks: This creates strain in the lower back. Keep feet close to maximize leg strength.
Collapsing into shoulders: Pressing more into your legs can help distribute the backbend more evenly.
Letting knees splayed outward: This reduces the beneficial stretch in the hip flexors. Keep knees tracking over ankles.
Crunching the neck: Allow your head to hang naturally or rest on the floor when first lifting up.
Holding breath: Maintain steady breathing throughout the pose to avoid unnecessary tension.
Cooling Down After Wheel Pose
After practicing Wheel, balance your spine with these counter poses:
Child’s Pose (Balasana): Kneel and fold forward, extending arms forward or alongside your body.
Supine Twist: Lie on your back, hug knees to chest, then allow them to fall to one side while looking in the opposite direction.
Happy Baby (Ananda Balasana): Lie on your back, grip the outsides of your feet, and gently pull knees toward armpits.
Conclusion
Wheel Pose offers tremendous benefits for both body and mind, but it requires patience and proper preparation. By following these five steps—assessing readiness, mastering preparatory poses, strengthening supporting muscles, learning proper technique, and progressing mindfully—you’ll develop the necessary foundation to practice this beautiful backbend safely and effectively.
Remember that yoga is a personal journey. Some practitioners may achieve full Wheel Pose in a few months, while others might take years—and both timeframes are perfectly acceptable. The true measure of success isn’t how quickly you achieve the final pose, but how mindfully you navigate the path to get there.
Check out our blog Yoga for Beginners: Let’s Bust Those Myths Together!
Practice with patience, listen to your body, and celebrate each small advancement. Before long, you may find yourself reaching new heights in your backbend practice, both physically and mentally.